
How to highlight and add notes to sources in NotebookLM (Gemini Notebook)

2 minutes 5 steps Updated

Quick answer

Open the Kortex Workspace, choose Sources, and click the color dot on a source. Pick one of eight colors. Write a note under Personal Notes & Thoughts, then click Save & Sync Notes. To find them later, filter by Highlight Color.

Watch it first

How to highlight and add notes to sources in NotebookLM (Gemini Notebook)
Read the transcript

Here's how to color-code sources from Gemini Notebook, formerly NotebookLM, and add a private note to each, in the Kortex Workspace. Open the Workspace with the Dashboard button in the side panel, then choose Sources. Find the source, and click the color dot beside it.

The Source Details panel opens on the right. Under Row Status Highlight, pick one of eight colors. The row takes that color.

The gray None circle clears it. Type a note under Personal Notes and Thoughts. Markdown works.

Then click Save and Sync Notes. To find them later, add the Highlight Color filter, choose Highlight is, then tick the colors you want. Color your sources, and keep a note on each.
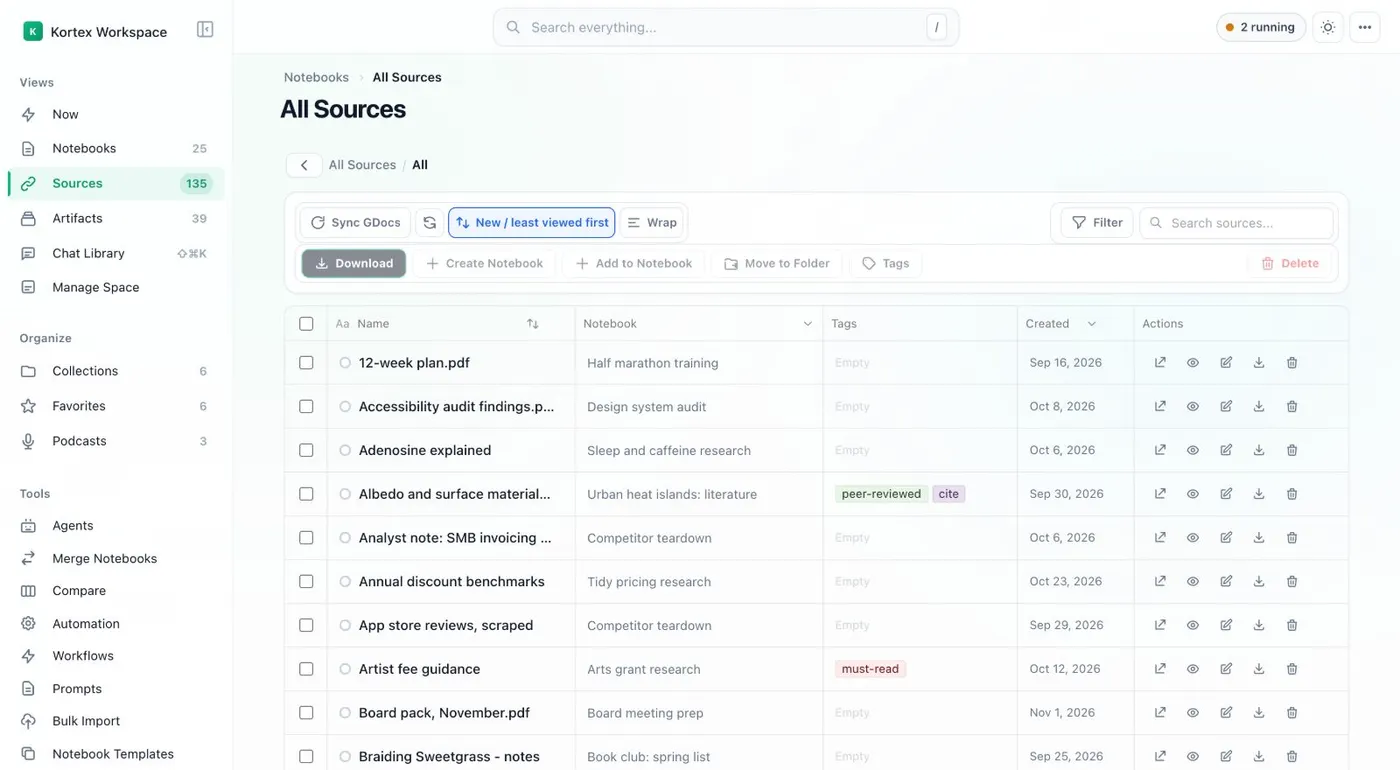
  1. Open the Sources view

    Click the dashboard button in the side panel header to open the Kortex Workspace. Choose Sources in the sidebar.

    The All Sources table in the Kortex Workspace with each source's type, notebook, tags and folder.
    Every source across your notebooks, with its tags and folder.
  2. Click the color dot on a source

    Find the source in the table. The dot beside it is titled Add highlight. Click it. The Source Details panel opens on the right.

  3. Pick a highlight colour

    Under Row Status Highlight, choose red, orange, yellow, green, blue, purple, pink or gray. The row takes that color. The gray None circle clears it.

  4. Write a note

    Type in Personal Notes & Thoughts. It accepts Markdown (simple text formatting). Click Save & Sync Notes to store it. A note icon shows in the row.

  5. Find the sources you flagged

    Add the Highlight Color filter to the table, choose Highlight is…, then tick one or more colors. No highlight shows the sources you have not marked.

If it doesn’t work

I do not see the colour dot
Reload the Workspace and check you are signed in to Kortex. The dot is in each row of the Sources view and of a notebook's own source list.
My highlights are not in Gemini Notebook
They do not show there, and that is expected. Highlights and notes stay in Kortex. They show only in the Workspace.

Questions people ask

Something we missed? Ask us.

How do I clear a highlight?

Open the source's Source Details panel and click the gray None circle under Row Status Highlight.

How many colours can I use?

Eight: red, orange, yellow, green, blue, purple, pink and gray.

Do notes change the source in Gemini Notebook?

No. Kortex keeps the note beside the source. It does not change the source.

Keep going

More tutorials

All tutorials

Do it on your own notebooks.

Install the Kortex extension and follow these steps on a notebook you already have.

100,000+ users, rated 4.5 on the Chrome Web Store.

Talk to the Kortex team

This opens a pre-filled email in Gmail. We usually reply within a day.