
Organize
Highlights and notes on sources
Kortex lets you color-code and annotate the sources of your Gemini Notebook (formerly NotebookLM) notebooks in the Kortex Workspace. Each source can have one of eight highlight colors and a private note written in Markdown. You can then filter the Sources table by highlight color.
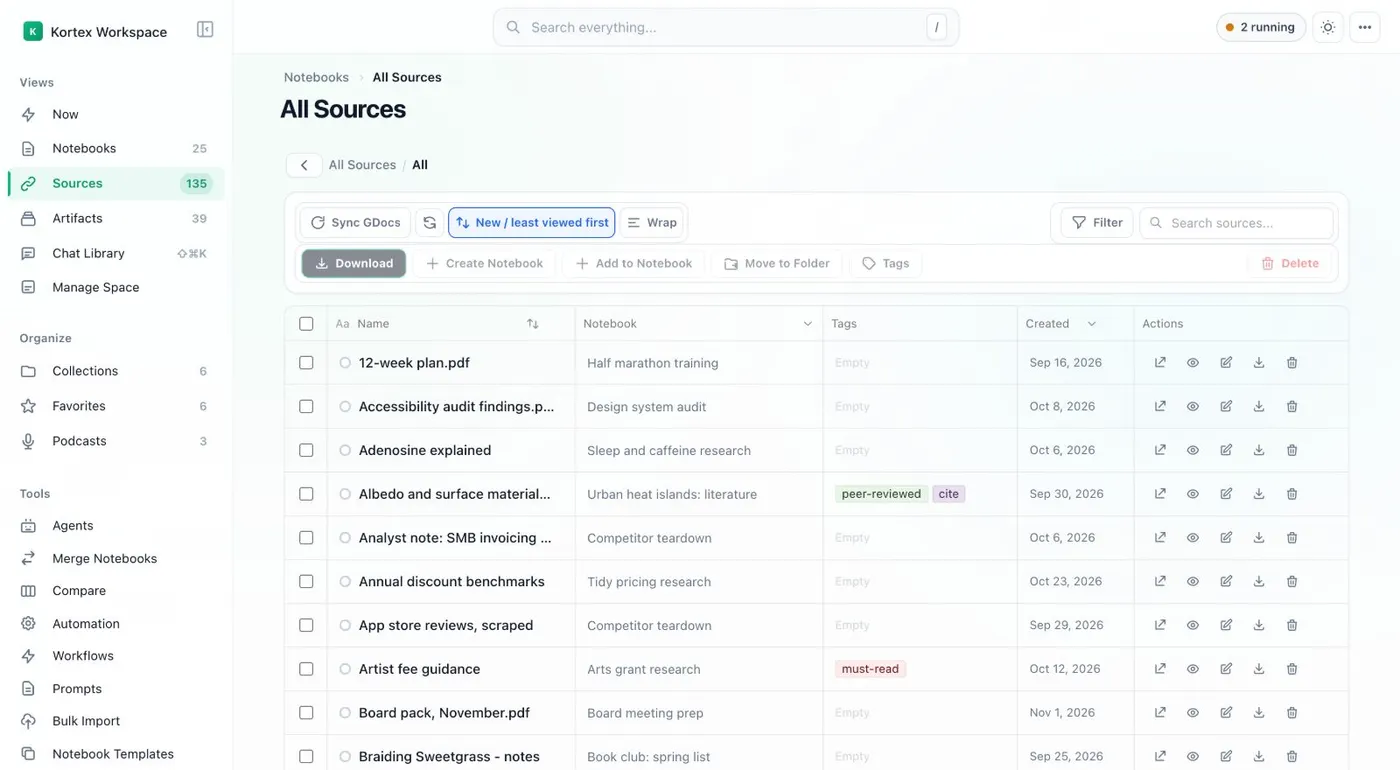
What are highlights and notes on sources in Kortex?
Highlights and notes live in the Kortex Workspace. Each source can have one of eight highlight colors and a note written in Markdown. You can then filter the Sources table by highlight color.
What you get
-
Mark what matters
Pick a color for each source: red, orange, yellow, green, blue, purple, pink or gray. The row takes the color, so flagged sources stand out in a long table.
-
Your own words, next to the source
Write key takeaways, a summary or a question about a source. A note icon shows in the row when a note exists.
-
Filter by color
Use the Highlight Color filter to show only the sources you marked, or the ones with no highlight.
-
You decide what colors mean
Use red for check this, green for done, or any code you like. Kortex does not give the colors any meaning.
How do I highlight a source?
Open Sources in the Kortex Workspace. Every source from all your notebooks is in one table. Each row has a small color dot. Click it and a Source Details panel opens on the right. It has two parts.
Row Status Highlight. Eight colors: red, orange, yellow, green, blue, purple, pink and gray. A gray circle marked None clears the highlight. The whole row takes the color.
Personal Notes & Thoughts. A text box that accepts Markdown (a simple way to format text). Use it for key takeaways, summaries or questions about that source. Save & Sync Notes stores it. A note icon then shows in the row.
How do I find the sources I flagged?
Add the Highlight Color filter to the Sources table. Then choose Highlight is… and tick colors, or No highlight to see what you have not sorted yet. The Notebooks table has the same highlight filter.
Using it well
Decide what each color means before you start, and keep to it. A common set is red for unreliable, yellow for to read, green for cited. Use colors together with tags. Tags say what a source is about. Colors say where it stands.
What it does not do
It does not edit the source or send the note to Gemini Notebook. The colors and notes live in Kortex and show in the Workspace.
How it works
Want every step? Follow the tutorial.
-
Open the Sources view
In the Kortex Workspace, choose Sources in the sidebar to see every source across your notebooks.
-
Click a row's color dot
The dot beside a source is called Add highlight. Click it to open the Source Details panel on the right.
-
Pick a color and write a note
Choose a color under Row Status Highlight, or the gray None circle to clear it. Type in Personal Notes & Thoughts, then click Save & Sync Notes.
-
Filter by highlight
Add the Highlight Color filter and choose Highlight is, then one or more colors, or No highlight.
Questions people ask
Something we missed? Ask us.
How do I clear a highlight?
Open the source's Source Details panel and click the gray None circle under Row Status Highlight. The row goes back to normal.
Where do the highlights show?
In the Kortex Workspace, in the All Sources table and in a notebook's own source list. They do not show inside Gemini Notebook.
Do my notes change the source?
No. Kortex stores a note next to the source. The source in Gemini Notebook does not change.
How is a note different from a Kortex note?
A source note belongs to one source. You write it in the Source Details panel. Kortex notes belong to a notebook and live on its Notes tab, where New Note makes one.
How many colors are there?
Eight: red, orange, yellow, green, blue, purple, pink and gray, plus None to clear.
Can I color-code sources in NotebookLM?
Yes, in the Kortex Workspace. Click the color dot on a source row and pick one of eight colors. The color lives in Kortex and does not change the source in Gemini Notebook (formerly NotebookLM).
Try it on your own notebooks.
100,000+ people use the Kortex extension. Install it and try highlights and notes on sources on a notebook you already have.
100,000+ users, rated 4.5 on the Chrome Web Store.