# Create an API key
:::note
**Kortex MCP is in private beta.** The connection details on this page are placeholders — the real endpoint is handed out when your beta invite arrives. Everything else here is accurate, so you can read ahead and turn up ready. [Join the beta waitlist →](https://forms.gle/1KeSLTxQHdSwpjPV9)
:::
Only needed when your client cannot open a browser — CI, scripts, curl. Everything else should [sign in](/docs/mcp-quickstart) instead, which needs no key at all.
## Generate the key
1. Click the Kortex icon in Chrome to open the popup.
1. Go to **Settings → General → MCP Connection**.
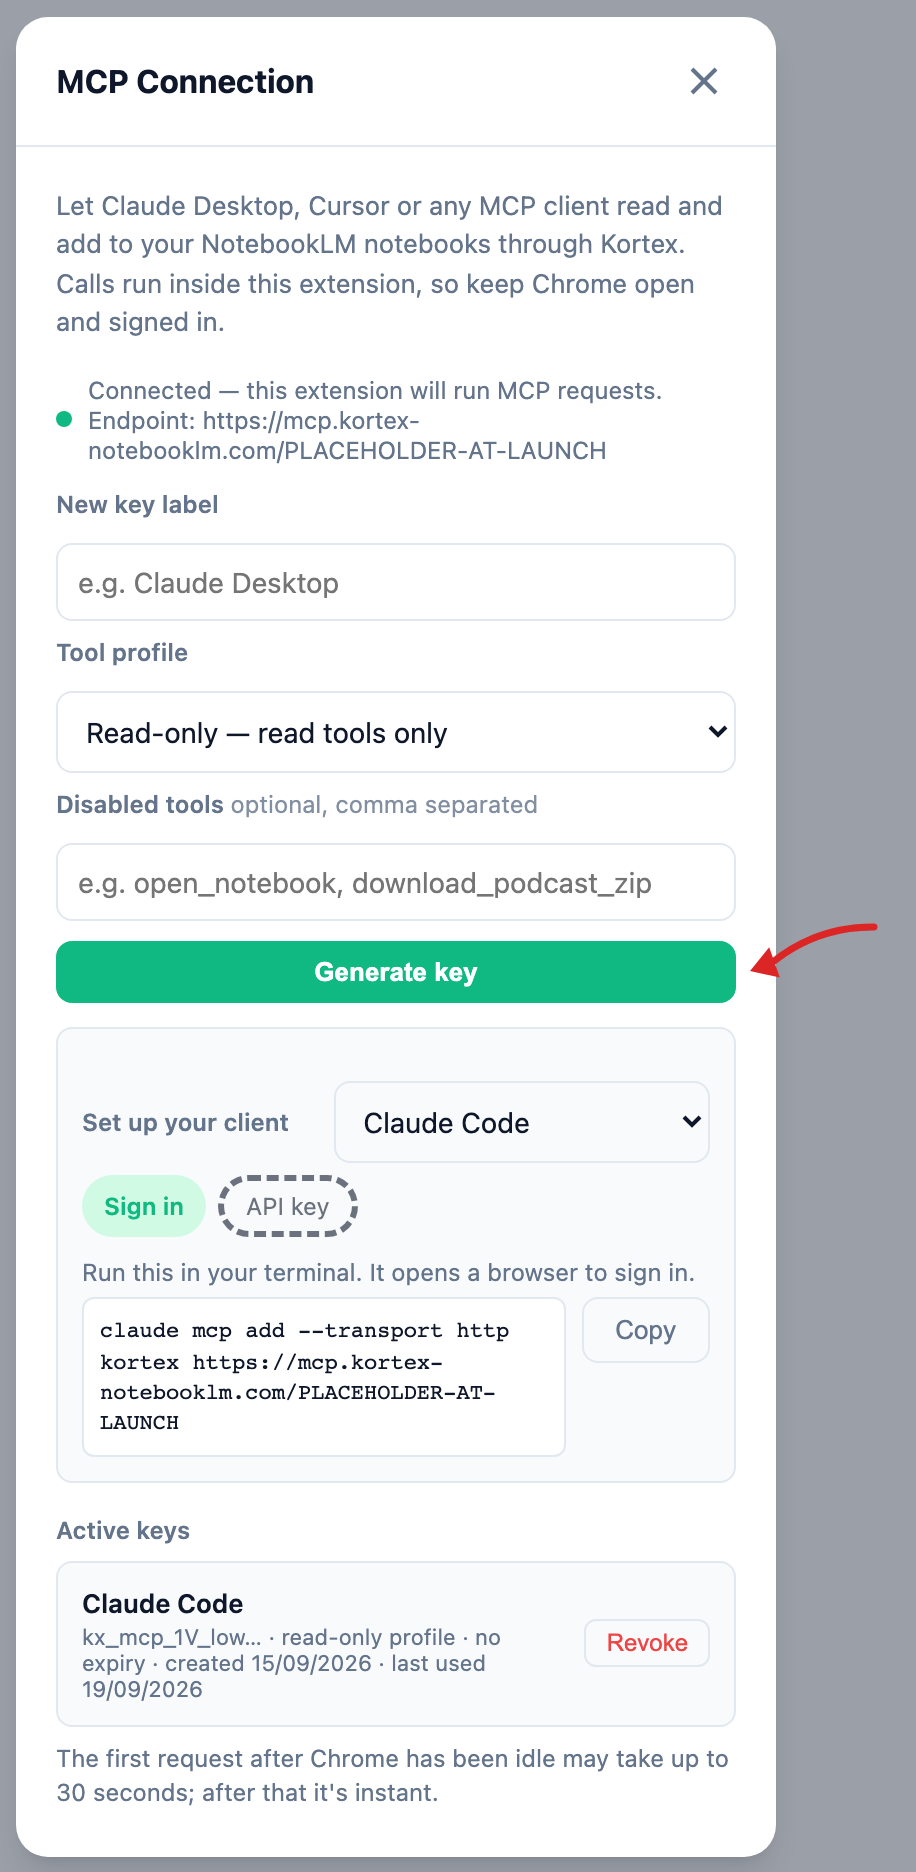
1. Give the key a label you will recognise later (for example `CI — nightly report`).
1. Choose a **profile**. New keys default to **Read-only**, which is the right choice unless you know you need writes.
1. Click **Generate** and copy the key. It starts with `kx_mcp_`.
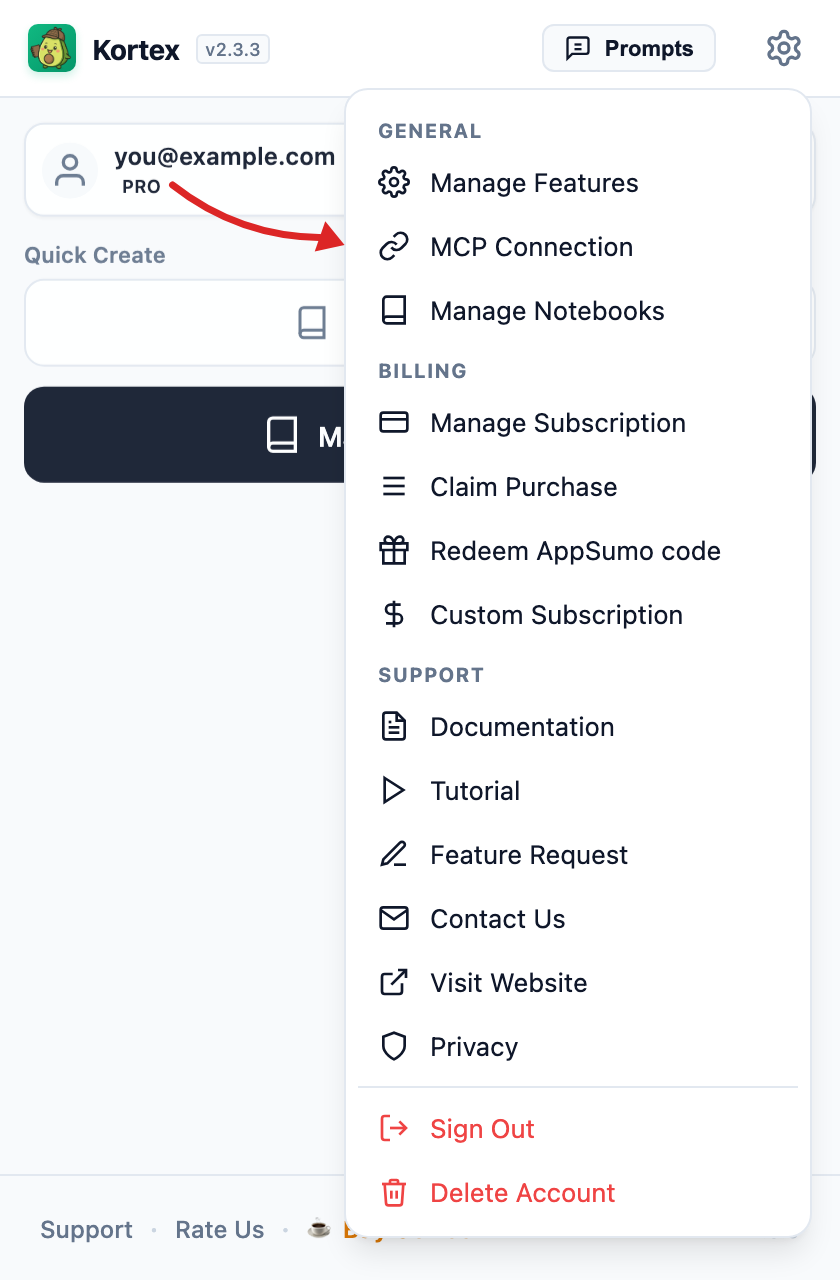 The panel that opens does all of it — mint a key, see whether the extension is currently reachable, copy the set-up snippet for your client, and revoke anything you no longer use:
 :::warning
The key is shown **once**. Kortex stores only a hash of it, so it can never be displayed again. If you lose it, revoke it and generate a new one.
:::
## Profiles
A profile decides which tools the key can reach at all. Pick the narrowest one that does the job.
| Profile | Reaches |
| --- | --- |
| **Read-only** _(default)_ | Read tools only. Nothing that writes or deletes |
| **Minimal** | Reads plus additive writes — adding sources, creating notebooks and notes |
| **Standard** | Adds renames and moves on top of that. Still never deletes |
| **Full** | Everything, including deletes |
The popup uses the same four words, so what you pick there and what you read here cannot drift. For what each one means tool by tool, see [Security & limits](/docs/mcp-security).
You can also name individual tools to disable, which is applied on top of the profile.
A profile is per key, not per account, so you can hand a read-only key to a client you trust less and keep a fuller one for yourself.
## Use it
Same URL as signing in — the server takes either credential:
```bash
claude mcp add --transport http kortex \
https://mcp.kortex-notebooklm.com/PLACEHOLDER-AT-LAUNCH \
--header "Authorization: Bearer kx_mcp_your_key_here"
```
:::note
Sending a key is what selects the key path. Omit the header and the same URL starts the sign-in flow instead.
:::
The popup shows a ready-made snippet for your client once a key exists — switch the panel from **Sign in** to **API key**. For every client's format, see [Connect your client](/docs/mcp-clients).
:::warning
The key is shown **once**. Kortex stores only a hash of it, so it can never be displayed again. If you lose it, revoke it and generate a new one.
:::
## Profiles
A profile decides which tools the key can reach at all. Pick the narrowest one that does the job.
| Profile | Reaches |
| --- | --- |
| **Read-only** _(default)_ | Read tools only. Nothing that writes or deletes |
| **Minimal** | Reads plus additive writes — adding sources, creating notebooks and notes |
| **Standard** | Adds renames and moves on top of that. Still never deletes |
| **Full** | Everything, including deletes |
The popup uses the same four words, so what you pick there and what you read here cannot drift. For what each one means tool by tool, see [Security & limits](/docs/mcp-security).
You can also name individual tools to disable, which is applied on top of the profile.
A profile is per key, not per account, so you can hand a read-only key to a client you trust less and keep a fuller one for yourself.
## Use it
Same URL as signing in — the server takes either credential:
```bash
claude mcp add --transport http kortex \
https://mcp.kortex-notebooklm.com/PLACEHOLDER-AT-LAUNCH \
--header "Authorization: Bearer kx_mcp_your_key_here"
```
:::note
Sending a key is what selects the key path. Omit the header and the same URL starts the sign-in flow instead.
:::
The popup shows a ready-made snippet for your client once a key exists — switch the panel from **Sign in** to **API key**. For every client's format, see [Connect your client](/docs/mcp-clients).
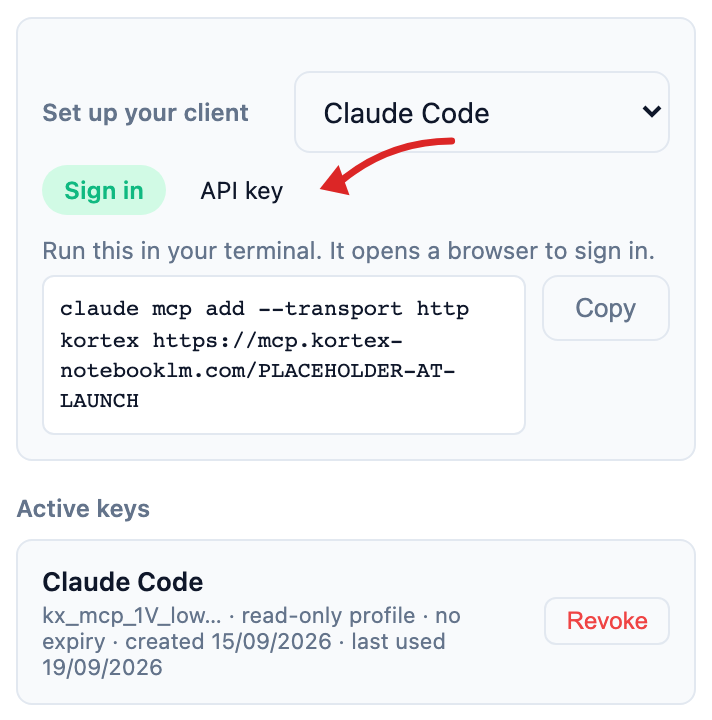 Pick your client from the dropdown and the snippet comes filled in for it — there is no placeholder left to hand-edit. Below it, every active key with the date it was last used, and a Revoke that takes effect on the next call.
## Check a key works
Ask the server for its tool list with any HTTP client:
```bash
curl -X POST https://mcp.kortex-notebooklm.com/PLACEHOLDER-AT-LAUNCH \
-H "Authorization: Bearer kx_mcp_your_key_here" \
-H "Content-Type: application/json" \
-d '{"jsonrpc":"2.0","id":1,"method":"tools/list"}'
```
A list of tools means the key is valid and Kortex is reachable. An error tells you which of the two is wrong.
## Revoking
The same panel lists active keys with the date each was last used, and revokes any of them immediately. Revoke rather than delete-and-hope if a key may have leaked: revocation takes effect on the next call.
Pick your client from the dropdown and the snippet comes filled in for it — there is no placeholder left to hand-edit. Below it, every active key with the date it was last used, and a Revoke that takes effect on the next call.
## Check a key works
Ask the server for its tool list with any HTTP client:
```bash
curl -X POST https://mcp.kortex-notebooklm.com/PLACEHOLDER-AT-LAUNCH \
-H "Authorization: Bearer kx_mcp_your_key_here" \
-H "Content-Type: application/json" \
-d '{"jsonrpc":"2.0","id":1,"method":"tools/list"}'
```
A list of tools means the key is valid and Kortex is reachable. An error tells you which of the two is wrong.
## Revoking
The same panel lists active keys with the date each was last used, and revokes any of them immediately. Revoke rather than delete-and-hope if a key may have leaked: revocation takes effect on the next call.